Thursday 31 December 2015

About Open Entries related to Purchase Order

1. Release Purchase Order to Invoicing.

2. Create a "Purchase Invoice Entry" in session tfacp2600m000. Now a record is getting created in session "Business Partner - Open Entries" i.e. tcacp2522m000. The Status of Invoice is "Registered" now.
You can also check the "Non-Finalized Transaction Lines" session to see which ledgers will get debit and credit entry.

3. Now Finalize the Batch. The "Business Partner - Open Entries" record is still in "Registered" status.  And the transactions are now moved to "Finalized Transaction Lines".

4. Now "Match the Purchase invoice". Status of line in "Business Partner - Open Entries" becomes "Matched". And the transactions remain unchanged in "Finalized Transaction Lines".


5. Now "Approve the Purchase invoice". Status of line in "Business Partner - Open Entries" becomes "Approved". And the transactions remain unchanged in "Finalized Transaction Lines".

Saturday 26 December 2015

slm- License Manager

LN connects to SLM via the SLM client configuration (C:\ProgramData\Infor\SLM\etc\servers.xml) on the LN server.

slmclienttest command on cmd
slmserver command on cmd

slm.msc file

Friday 27 November 2015

Create User

1. create a local user/Network User: example, E1207919 is a Network User.
- Right Click on Computer-- Select Manage-- "In Server manager" browse to Configuration/Local Users & Groups/users  folder-- Add the Local User.
2. On LN, create an user in "User Data -ttaad2500m000" session and assign him necessary roles in Authorizations tab. Here "System login" field is the Windows User Id, whose Authentication details will be used to let him login on LN.
3. "Convert Changes to Runtime DD" for that User.
4. Select specific option- "Create Database User..." in session User Data, for creating a database user corresponding to LN User. 

Sunday 22 November 2015

Baan Technical Architecture (Source- baanboard.com)

There are several ways of looking at the architecture behind Baan. From an administrator's perspective the chain model is prefered because it serves as a troubleshooting roadmap for any kind of connectivity issue. Just follow the chain until you find a broken link. If no links are broken, then it is time to call in the cavalery or put on your System Administrator's hat.
The hipbone's connected to the backbone...

The Chain Model

Presentation layer

  • Client (BW/BA/BI/BX/Worktop)

Application layer

  • Director (${BSE}/bin/ipcboot6.2)
  • Mapper (${BSE}/lib/ipc_info)
  • Wrapper (optional)
    • ENV trunk (optional)
  • Virtual Machine (bshell6.2)
    • Variables
      • lib/defaults/all
      • lib/defaults/bshell
      • lib/user/uname
  • Database Driver
    • Variables
      • db_resource

Database layer

Database

User connections in Baan (let's leave OpenWorld? out of the picture at this time. Baan does that in most of their versions too.) originates from the client. The client first calls the Director, the executable ipcboot6.2 (extention varies by tools set), which in turn collects information from the Mapper (ipc_info) to direct the client to its assigned virtual machine. Instead of going directly to the virtual machine, it is recommendable to have a wrapper script in place. This script can perform several household tasks (like checking the number of allowed connections per user, create a log of the users connection attempt, etc.) before calling the bshell6.2 executable. It is also recommendable to call an external file from the wrapper script that contains all required environment variables for Baan, the database and any third party software that may require these. Placing these vars in a separate file provides transparancy and easy maintenance. Once loaded, the virtual machine in turn reads variables from a number of different files before starting the database Driver. The database driver collects variable information from the db_resource file and makes the final link to the system's back-end.

Client

BW

BA

BI

BX

Worktop

Webtop


IPC_INFO

Here is an example of what ipc_info might look like. Older tools versions contain 6 columns.
bshell p ${BSE}/bin/mywrapper
bshell.test p ${BSE}/bin/mynewwrapper
bshell.trace p ${BSE}/bin/mywrapperthatstartsabshellwithtraceoptions
bshell.oratrace p ${BSE}/bin/mywrapperthatstartsabshellwithdbdrivertraceoptions
bshell.inst p ${BSE}/bin/bshell_inst6.2
audit p ${BSE}/bin/audit_srv6.2
sh_server s ${BSE}/bin/sh_server6.2
fs6.2 m ${BSE}/bin/fs6.2
nserver s ${BSE}/bin/nserver6.2
informix p ${BSE}/bin/inf_srv6.2
oracle7 p ${BSE}/bin/ora7_srv6.2
oracle8 p ${BSE}/bin/ora8_srv6.2
sybase p ${BSE}/bin/syb_srv6.2
db2 p ${BSE}/bin/db2_srv6.2
When the BW client connects to Baan, it scans the ipc_info file�s first column for an entry that matches the Bshell Name defined in the bshell environment. It then executes the corresponding field in the last column, which can be either the Baan Virtual Machine, or (as mentioned above) a wrapper script.
The second column in the table indicates whether the connection to the executable is made through pipe (p) or socket (s) or duplex (aka combo) mode (d). The combo mode is used for database drivers only and causes the database driver to be loaded in the virtual machine as a shared library, rather than as a separate process.


Wrapper Scripts

There is but one rule when building a bshell wrapper, which is that at some point in your code, you'll have to call the bshell6.2 executable.
This is the basis of all wrappers. Stripped to the bone it would look like:
#!/bin/ksh
${BSE}/bin/bshell6.2 $*
This script does nothing but start the baan virtual machine and is therefore pointless, but it serves as the foundation for anything you care to add on top of it.
#!/bin/ksh
. ${BSE}/setenv
${BSE}/bin/bshell6.2 $*
This version calls the file setenv, which contains all variable settings that are applicable to the Baan application. It could look like this:
export BSE=/opt/apps/baan/5.0b/bse
export BSE_TMP=${BSE}/tmp
export PATH=${PATH}:${BSE}/bin
export TERM=vt100
export ORACLE_BASE=/opt/apps/oracle
export ORACLE_HOME=/opt/apps/oracle/product/8.0.5
export ORACLE_SID=mybaan
export BDB_DATE=MM/DD/YYYY
export BDBCO=100
export FSRCO=100
export BDBSY=000
export BDB_LANG=2
export SESSION_TIMEOUT=120
export DS_TIMEOUT_DETECT=10
export DS_MAX_WAIT=60
Important here is that the $BSE and $BSE_TMP variables get set plus the database path (Oracle in this case).
An other addition could be to log all connection attempts in a file called loghist. This would make the wrapper script look like this: 
#!/bin/ksh
. ${BSE}/setenv
print `date` " | ${USER}" >> ${BSE}/log/loghist
${BSE}/bin/bshell6.2 $*
In addition, several tests can be performed on the user that is trying to connect (like checking the number of existing connections) and action can be taken accordingly before a virtual machine is launched.


BSHELL6.2

The executable bshell6.2 is the Baan virtual machine. Although everybody has heard of the term, in my experience not too many people(including seasoned Baan Admins) truly understand this concept or the rammifications of it. Foldoc's (second) definition of a VM is "A software emulation of a physical computing environment", which fits the Baan model perfectly. Picture your bshell as a PC, sitting somewhere out in serverland and you are connecting to it with a remote control program called your BW client. The benefit of using this method is platform independence, which was a big issue for ERP vendors during the 90s. [personal note: I never understood this need. When purchasing a multi-million dollar ERP program, one would think there is room in the budget for a dedicated server. Like all compromises, platform independency is a trade-off. Memo to ERP barons: Make a deal with a hardware manufacturer and just throw in your prefered, tested, QA'd server for "free".]
Bshell Options
The bshell can be started with several options. These options can be set on the client level or at the command line. Some can even be invoked after the bshell has started. The list below was sitting on my hard drive, but I believe it comes from Baanboard and we have NPRao to thank for it.

Options from the bshell6.x

(ntbshell.exe on NT)(can also be set with "-- [options] [program...]" in the Option Dialog window in bw or BECS)(*) = documented in bshell6.2
-appendlog : append to logfile (only useful with -logfile option)
-ba : connect with ba display server
-bx : connect with bx display server
-deftext : show bshell texts
-dbgbdbact : show the Baan database activities initiated from the bshell
-dbgcpu : use debug version of the cpu
-dbgdata : show datainput options (not for fields!)
-dbgenums : show loading of enums
-dbgfdev : debug file access
-dbgfile : show successfully opened sequential files
-dbgflow : show program flow (6.1c.06.03+)
-dbgfun : debug functions
-dbggpvar : debug get & putvar
-dbginstr : show bshell cpu instructions
-dbgjvmi : show JavaVM integration actions
-dbglck : show locking errors
-dbglts : debug Language Translation Support (LTS) X=dump, B=RDD, F=component
-dbgmem : show all memory statistics (see below)
-dbgmemblk : show memory usage per block
-dbgmemfree : show free memory list
-dbgmemtot : show total memory usage
-dbgmemused : show used memory list
-dbgmesg : stop debugger when warning message is sent to the display server (*)
-dbgmulact : show process actions (activate,sleep,kill etc.)
-dbgobj : show object information
-dbgorb : debug ORB (Object Request Broker) integration (where available)
-dbgpty : debug pseudo terminals pty
-dbgref : show reference paths
-dbgrefer : show references
-dbgres : show loaded resources
-dbgsched : debug scheduler
-dbgsrdduse : show srdd usage
-dbgsrv : show bdb server type
-dbgstack : dump 3GL stack traces on function entry
-dbgtss : Show TSS-diagnostics and go to debugger on TSS-error
-dbgflow : Unknown
-deftext : show bshell texts
-delay : delay for seconds before continuing (useful for attaching with a debugger:
set breakpoint at the function 'delay_ready')
-dsunicode : communicate with the display driver using Unicode strings (*)
-keeplog : don't remove the logfile after ending the bshell
-logfile : log stdout/stderr output in
-logtag <tag> : used together with -logfile. The <tag> is used in the logfile and is
especially useful when logging from multiple bshells (*)
-logtime : add time stamps to bshell log output (combine with -dbgmulact)
-mdebug : display bshell messages sent to display server
-nodebug : disable debugger.
-nolog : stdout and stderr will go to the controlling terminal (if possible - on remote
connection no output will appear)
-nounicode : don't read unicode files $BSE/lib/unicode/*.(N2U|U2N). (*)
-r : show resources
-server : run as a server without UI
-set var=val : set environment variable 'var' to 'val' (see below)
-vV : show program version
-windownames : pass unique window names to user interface for testtools (*)

Unknown options

-auto
-text "vi %s" vi +%d %s

With the option "-- -set var=val"

you can also pass other environment setting to the bshell (and underlaying processes) that have a special meaning.

Tracing and Logging:

-set TT_SQL_TRACE=value (or added values)" Logging information from the Baan database driver. Maximum value = 0277367
-set TT_SQL_TRACE=0000001 Parse Query Strings and show information
-set TT_SQL_TRACE=0000002 Show RDD usage of Query
-set TT_SQL_TRACE=0000004 Final Dump info queries
-set TT_SQL_TRACE=0000020 Database Actions ("Operand" "Operator")
-set TT_SQL_TRACE=0000040 Show queries wih their QID
-set TT_SQL_TRACE=0000100 Mode of query
-set TT_SQL_TRACE=0000200 Show query exec. times
-set TT_SQL_TRACE=0001000 Show table dependencies (matrices)
-set TT_SQL_TRACE=0002000 Show calls of internal SQL functions
-set TT_SQL_TRACE=0004000 Show query eval. plan (client+server)
-set TT_SQL_TRACE=0010000 Show quey ev. plan (server)
-set TT_SQL_TRACE=0020000 Show all full table scans
-set TT_SQL_TRACE=0040000 Database Action Messages
-set TT_SQL_TRACE=0200000 Query Distribution Plan
-set TT_SQL_TRACE=0400000 Show current time to level of milliseconds
-set BDB_DEBUG=value (or added values)" Sets debugging link between client and server
-set BDB_DEBUG=0001 Server information
-set BDB_DEBUG=0002 Communication between Server and Client
-set BDB_DEBUG=0004 Show information on currently set locks
-set BDB_DEBUG=0010 Show references between tables
-set BDB_DEBUG=0040 Show all tables using native storage format
-set BDB_DEBUG=0100 Permissions
-set DBSLOG=value (or added values)" Logging information from the online processing of the database driver.
-set DBSLOG=0000001 Data dictionary info of tables
-set DBSLOG=0000002 Query info (SQL level 1)
-set DBSLOG=0000004 Query info (SQL level 2)
-set DBSLOG=0000010 Row action info
-set DBSLOG=0000020 Table action info
-set DBSLOG=0000040 Transaction info
-set DBSLOG=0000100 DBMS input/output data (SQL level 2)
-set DBSLOG=0000200 Admin file info (SQL drivers)
-set DBSLOG=0000400 DBMS SQL statements
-set DBSLOG=0001000 General debug statements
-set DBSLOG=0002000 Query processing info
-set DBSLOG=0004000 Data buffering info (communication)
-set BLAT=option (may be added and combined)" starts Binary Logging And Tracing, spawning the whole range from bshell to the database driver (6.1c.06.03+/7.1c.02+)
-set BLAT="off"
-set BLAT="default" default is "t0 s1 t1 s1 t2 s0 t3 s0 th 5 t4 s011 th 5"
-set BLAT="logfile ""<path_and_filename>""" redirects output to filename (defaults to $BSE/tmp/blat.log)
t0 = proc
-set BLAT="proc s 00" no logging of Baan processes and their hyerarchy
-set BLAT="proc s 01" logging Baan processes and their hyerarchy
t1 = sess
-set BLAT="sess s 000" no logging lifetime of Baan sessions and propagation
-set BLAT="sess s 001" ... on 3GL/BDB level (client)
-set BLAT="sess s 002" ... on DBS level (database driver)
-set BLAT="sess s 004" ... on DBDL level (database driver/RDBMS integration)
-set BLAT="sess s 010" ... on DBS level (audit driver)
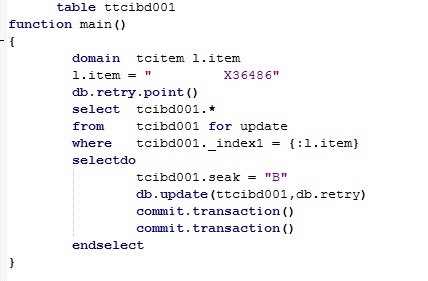
t2 = retry
-set BLAT="retry s 00" no logging of handling retry.points
-set BLAT="retry s 01" logging of handling retry.points
t3 = trans
-set BLAT="trans s 000" (commit and abort) transaction related logging off
-set BLAT="trans s 001" ... on 3GL/BDB level (client)
-set BLAT="trans s 002" ... on DBS level (database driver)
-set BLAT="trans s 004" ... on DBDL level (database driver/RDBMS integration)
-set BLAT="trans s 010" ... on DBS level (audit driver)
-set BLAT="trans th value" ... allows logging with threshold value [seconds]
t4 = sql
-set BLAT="sql s 000000" no logging of handling queries
-set BLAT="sql s 000001" ... 3GL/BDB level: Log aggregated information
-set BLAT="sql s 000002" ... 3GL/BDB level: Log all actions
-set BLAT="sql s 000010" ... 3GL/BDB level: Log BaanSQL text
-set BLAT="sql s 000020" ... 3GL/BDB level: Log bind variables
-set BLAT="sql s 000040" ... 3GL/BDB level: Log selected data
-set BLAT="sql s 000100" ... DBdriver Level2: Log aggregated information
-set BLAT="sql s 000200" ... DBdriver Level2: Log all actions
-set BLAT="sql s 001000" ... DBdriver Level2: Log BaanSQL text
-set BLAT="sql s 002000" ... DBdriver Level2: Log bind variables
-set BLAT="sql s 004000" ... DBdriver Level2: Log selected data
-set BLAT="sql s 010000" ... DBdriver Level1: Log aggregated information
-set BLAT="sql th value" ... allows logging with threshold value [seconds]
Note1: Processing of the loggings is supposed to be done by using tools.
See $BSE/api/blat (and Perl module Blat.pm)
Note2: Instead of spaces as (the default) separator an alternative (set by BLATSEP) can be used to
make it possible to have one argument on the environment variable assignment. -set BLATSEP=_
Note3: Not all options are implemented yet
Note4: the value of the threshold will allow only values that exceed the threshold value to be logged,
may also be "off" or "default".
Note5: bls6.x converts BLAT logfiles to readable format: open source example included
Note6: btop6.x reads the top <n> queries from the BLAT logfiles (logged with "sql s 011" option).
 

-set BAAN_ART_TRACE=[0|1|2|5]" Set this variable to debug the ARTM code in the application scripts.
-set BAAN_ART_TRACE=0 Tracing disabled.
-set BAAN_ART_TRACE=1 Basic tracing. Transactions are shown.
-set BAAN_ART_TRACE=2 Basic tracing plus the binary blocks that are sent to the ARM library
-set BAAN_ART_TRACE=5 The trace information is send to the file $BSE/tmp/bshell.pid.
-set BAAN_ART_USER='BAAN' Username under wich the transasctions will be registered
-set BAAN_ART_LIB=/opt/perf/lib/libarm.o Location of ARM library
Enable ART in $BSE/lib/defaults/all with
art_enable:1
art_trace:1
art_user:baan

Common BShell environment settings

Several common settings that influence the user environment overrule user settings in RDD
-set BAAN_WIN_TITLE=string_value sets a caption for the menu browser other than the default,
can be composed with:
%C Company Name
%c Company Number
%h Host Name
%p Package Combination
%s Session Code
%S Session Name
%u Userid
-set FONT=fixedsys use a non-standard font within BW
-set FONT_WIDTH=width_value use a non standard font width
-set FONT_HEIGHT=height_value use a non standard font height
-set BSE_COMPNR=company to login into specific company, note package combination must match or
no difference with current package combination
-set BSE_LOG_COMPNR=company to login to specific logistics company (>= Tools 7.3a, see solution 141113)
-set BSE_FIN_COMPNR=company to login to specific finance company (>= Tools 7.3a, see solution 141113)
-set BSE_LANG=value to change language (1=Dutch, 2=English, 3=French, 4=German etc.)
-set BSE_TMP=temporary folder to use a temporary folder other than $BSE/tmp
-set COMP_NR=company same as BSE_COMPNR
-set DS_AS=bshell_name [for ba6.1 only, to specify a specific bshell name from ipc_info] :
like setting Bshell Name in bw
-set DS_MAX_WAIT=value the timeout duration [seconds] in which BW has to respond to the sync message,
and override the default of 30 seconds
-set DS_TIMEOUT_DETECT=value the timeout duration [minutes] before the bshell starts sending a
sync message to BW
-set PACKAGE_COMB=package combination to login into specific package combination
-set NO_PC_CHECK=[0|1] if 1 then skip package combination/user/company check when starting session (sol 127095)
-set SESSION_TIMEOUT=value the number of minutes the bshell can be inactive before it terminates itself,
when the timeout is triggered a message is sent to the UI and the bshells stops
-set SUPPRESS_WINHELP=1 if you choose help the baan help appears instead of the windows version
of the baan help
-set UI=ascii allows to run bw with an ASCII interface
-set NO_WORKTOP=1 allows Gemini (Baan 6) users to run with just bw inteface, since gemini requires worktop by default
-set USE_SHM_INFO=value enables or disables shared memory use (*)
-set USER=baan_user to login using a different user (use the same system login with several Baan logins)
-set USR_DBC_RES=file specifies alternative resource file for client to read after the file
$BSE/lib/defaults/all is read.
Allows to overrule settings in the all file with setting a different value in the specified file
BShell settings for job management
Settings for job management
-set BSH_JOB=job set a job to active when starting the bshell
-set BSH_JOBOK=jobokfile set the file to be written to if job completes succesfully, or progress of job if BAAN_EXTJOB is set.
-set BAAN_EXTJOB=2 to turn on writing job history to the BSHJOB_OK file.
-set BAAN_JOBDAEMON=x Unsure of purpose, referenced in solution 72399.
BShell environment settings for specific tasks and applications
Settings for programmers and other specific tasks
-set AUDIT_FILE_PATH=folder set the location of the audit files
-set BAAN_SCM_GRP=value sets your checkout directory so more everyone that uses the same group
can see your changes.
-set BDB_DRIVER=value Sets database specifications
-set BDB_MAX_SERVERS_=value Defines the mechanism for schedule SCHEDULE closing idle server sessions
-set BDB_MAX_SESSION_=value defines mechanism for closing schedule SCHEDULE idle driver sessions
-set BDB_MAX_SESSIONS=value defines number of sessions per driver
-set CUNO_SRC=1 allows for exporting sources (used by Baan PEG with SMT)
-set DBSLOG_LOCK_PROF Specifies lock time above which locks are logged (*)
-set DBSLOG_LOGNAME=file Allows file name to be specified for logging (*)
-set ENABLE_REFMSG=value causes logging of denied update or delete actions (*)
-set LOCK_RETRY=n defines the number of lock retries and the sleep period between retries
-set MAX_RETRY=n the system may return n times to a retry point in case of an abort in an
update action, default=10
-set RDS_FULL=value to define max. nr. rows transfered between client and server as one block
(good for imports/exports)
-set SSTS_SET_ROWS=value Sets number of rows read ahead (single table single row)
-set TEST_RETRY=n each retry point is triggered n times
-set HIDE_FORMAT_ERRORS=[0|1] hide format errors due to $BSE/lib/datecurr, see solution 133239 (>= Porting Set 7.3a.03)
-set AFSLOG=1 Will log AFS calls in file afs.log
-set USE_MSJAVA_DLL=[0|1] configure use of Sun JVM (0) rather than default MS JVM (1 or unset) (>= 6.1c.07.03)
-set USE_ENHANCED_HOSTID=1 set to enable MAC address detection if NetBios protocol unavailable (>= 6.1c.07.04)
-set USE_MBTEXTCONV=[0|1] Enable multibyte text conversion when using notepad as text editor (sol 131939)
-set OLETRACE=1 Turn on tracing of OLE calls, useful for debugging worktop
dbsinit specifies optimistic or pessimistic reference checking and some MultiByte settings
inf_use_prepare_cache:0 in $BSE/lib/defaults/db_resource turn off the Prepare Statement Cache

-set USR_DBS_RES=file Specifies alternative resource file for server
Audit Debugging
-set AUDITLOG=octalval Turn on debugging of audit server, normally not enabled. Level of debugging is set by building up a value from the following octal values:
0001 General information.
0002 Print audit rows generated.
0004 Print audit-data dictionary for table.
0010 Print data structures such as information header, sequence header, and
The information is put in a log file. The name of the file is audit.log.pid of the
server. This file is created in the current directory of the audit server.
MS-SQL Specific resources
-set MSQL_JOIN_HINT=NONE Disable join hints, by if unset (default) join hints are default enabled. (>= Porting Set 7.3a.03)
Some unknown variables
-set BMASK=02
-set CORE=
-set LINES=
-set USE_BMASK_AS_ABSOLUTE=1
-set BSH_FRSES
-set IPC_NOSPAWN=1. This causes a fork() i.s.o. a spawn() between ba and bshell
-bse. Something to do with setting the bshell environment. (See porting set 7.3a.03 bugfix notes)
Call Graph Profiler (Porting Sets 6.1c.07.03+, 7.1d.03+, 7.3a.04+)
Creates a directory full of HTML files showing profile information.
-set PROFILE_ALL=1 Start profiling for all objects
-set PROF_DIR=<dir> Output files to specified directory, uses ${BSE_TMP} if unset
-set PROF_RTIME=1 Add section sorted on wall clock time (real time)
-set PROF_CLIENT="<action>:<dir>": Only Porting set 7.3a+
e.g. -set PROF_CLIENT="start:c\temp"
action = Either "start" or "save" to start client machines local browser
dir = full pathname to a directory on the local client PC.
no_ipc_msg_window:1 workaround for low number of users on Windows, see solution 121503 & porting set bugfixes76a02.txt

About $BSE\lib and $BSE\bin folders in $BSE

What does $BSE\lib contain?
1.       ipc_info contains the bshell name. If you change the bshell name here then you will have to change the bshell name on the BECS configuration file as well. So whenever you want to restrict your users from accessing the LN System try plating with the bshell name.
2.       TIME.HIS  is a file that maintains the details about which sessions are accessed by which users and for what time period. This logging can be enabled from session - ttams1110m000. Access “Print User History Session(ttaad2402m000)” to read this log.
3.       datecurr contains the date and currency format codes and their respective formats.
4.       sensitivity_reports, sensitivity_sessions and sensitivity_tables are also present here.
5.       Definition files related to Audit Management are also maintained here.

What does $BSE\bin contain?
1.       Startjob.bat to start jobs in automatic mode. So when ever you want to run a job from "Windows Command Prompt" you will need this utility.

2.       Application exes like ntbshellbic_info, audit_srv, tssinfo, bdbreconfig, etc. are also present in this folder.

Tuesday 29 September 2015

Integration Transaction

A financial transaction that is generated through LN packages other than Financials. For each logistic transaction that must be reflected in Financials, LN generates an integration transaction, for example, Purchase/Receipt, Production/WIP Transfer, and Project/Costs of Goods Sold. LN posts the integration transaction to the ledger accounts and dimensions defined in the integration mapping scheme.


Inventory Transaction ID
The ID code generated for the current inventory transaction. Every transaction in LN will have an Inventory Transaction ID associated with it.

Search for the ‘Inventory Transaction ID’ in Financials -> General Ledger-> Integration Transactions-> Integration Transactions (tfgld4582m000) to get the “Integration Document Type” for the ‘Inventory Transaction ID’ under consideration.

For Example, In session “Inventory Receipt Transactions- whina1512m000” you can find the ‘Inventory Transaction ID’ generated during receipt of the Purchase Order. And then open “Inventory Integration Transactions- whina1524m000” to search for the “Integration Transaction” and “Integration Document Type” for the ‘Inventory Transaction ID’ under consideration.


Financials -> Integration Transactions-> Integration Document Type (tfgld4557m000)
It’s a combination of <origin> & <Transaction>.
Eg. 10014052 - Production Order/ Issue
Represents a type of Operations Management transaction for the purpose of mapping and posting the integration transactions to Financials and for financial reconciliation.
The integration document types supplied by LN each have the corresponding business object attached to them. For example, the integration document types for the various sales order transactions have Sales Order business Object linked to them. The business object represents the transaction origin of the integration document type.
Specific option -> Elements by Integration Document Type (tfgld4558m000) can be used to view the available mapping elements for an integration document type. The Debit Ledger Mapping Applicable and the Credit Ledger Mapping Applicable check boxes indicate whether the mapping element can be used for debit mapping or credit mapping. Element that determines which ledger account will be debited/credited.


Financials -> Integration Transactions-> Mapping Scheme (tfgld4573m000)
Use this session to view, enter and maintain the details of a mapping scheme version. Only one mapping scheme version can be Active at a time.
Integration Mapping Scheme, can be defined as a scheme that defines the ledger accounts and dimensions to which the integration transactions are posted.

Specific option -> Mapping by Element Group (tfgld4667m000)
Use this session to maintain ledger mappings and dimension mappings by element group. Depending on how you started the current session, this session's sole tab shows data from either of these sessions: Dimension Mapping (tfgld4571m000) or Ledger Mapping (tfgld4569m000)

You can define condition based on which LN will decide which Ledger Account should be debited or credited. E.g. Based on Warehouse in which Adjustment is done, debit/credit a different Ledger.


There are 4 sub-sessions to this session:
1.     Mapping Scheme Details- Detailed mapping of IDT to a ledger based on Element.
E.g. Based on Warehouse we can split the entries to different ledger on IDT say “Production Order/Issue”.
2.     Document Numbering/Compression- IDT to Transaction Type mapping is done here. Only Journal Voucher transaction types can be selected at this level. 1 Transaction type can be linked to all the IDTs. But if that is done then tracking the document number to IDT relation will become difficult.
3.     Default Accounts- Simple mapping between IDT to Ledger is specified here.  

4.     Errors and Warnings- Errors and warnings can be seen here. These are generated when we do “Check Mapping Scheme”.

Receipt Tolerance Quantity in Infor LN

Following set up can be done to allow user receive partially but to restrict user from receiving more than the Purchase Order Qty:
1.       In “Items-Purchase Defaults” do the following setup-
Qty. Tolerance (-) = 100%
Qty.Tolerance(+) = 0.00%
Hard Stop on Quantity = Block
2.       In “Items-Purchase Data” do the following set up-
Qty. Tolerance (-) = 100%
Qty.Tolerance(+) = 0.00%
Hard Stop on Quantity = Block
3.       For the Items whose Purchase Order is in progress, search for all the Inbound Lines and set ‘Hard Stop on Quantity’ field to “Blocked”
4.       For the Header of the Inbound Line set “Minimum Quantity Tolerance” to 100.00% and set “Maximum Quantity Tolerance” to 0.00%.
This change can be done till you didn't Confirm the Warehouse Receipt of the Purchase Order.
5.       For Items who don't have “Release to Warehouse” as one of the activities, we need not modify any data at the Warehousing level. Modifying at the “Items-Purchase Data” level is enough.


Extra Information:
- Similar fields are present to handle Over Delivery of a Sales Oder. Refer to “Item Sales Defaults”, “Items-Sales Data” and  “Outbound Lines” sessions that will handle this.
- For Sales Return where “Outbound Lines” is not created, system will consider “Inbound Lines “ fields but this time these fields will be controlled by ‘Items-Sales Data’.
- Item - General Defaults (tcibd0102s000)- If you define an item of this type and item group in the Items - General (tcibd0501m000) session, LN enters the default data in the fields of the Item - General (tcibd0101s000) details session. You can then use the default values or change the values as required.

Monday 21 September 2015

Transaction handling in ERP LN/BAAN

Example 1:

Consider running the below 2 3GLs concurrently,
1.       otdsndtestdb

2.       otdsndtestdb2


Imagine db.update of both the 3GL is executed  and we kept  break point at the commit transaction statement of both.
Now we first execute the commit.transaction() statement of first 3GL.
And then when we execute the commit.transaction of 2nd 3GL the cursor is taken to the db.retry.point() and then again the new values of record is read and is updated and then committed thereafter.


----------------------------------------------------------------------------------------------------------------------------------------------------------------------------------------------------------------------------------------------------


 Example 2:
  
Doing db.update on the same record twice for the same record selected with “for update” clause is ok.


But once you commit the changes inside the select for update on a record you cannot do db.update() on the same record. See the below example, where the system will fail in the second db.update statement. That's because the “for update” delayed lock mechanism will release the delayed lock on the current record inside selectdo once we do commit. Thus the next db.update will  fail.


Again, having multiple commits inside a selectdo is fine. Below code will work:-

Wednesday 16 September 2015

Startup Session for a LN user

Suppose we want to open a particular session every time a user logs in....

We need to follow the below steps-
1. Create a session group in ttaad2107m000 (Session Group).
2. In session ttaad2106m000 (Startup Sessions) add the session that should start automatically.
3. Link the Session Group that you created in ttaad2105m000 (User Settings) 

Monday 17 August 2015

Disable the user ID

1. Delete the Link Between LN User and DB User(If exists) from session ttdba0510m000 and do Convert to Run Time
2. Delete DB User for that user(if exists) from session ttdba0515m000 and do Convert to Run Time
3. Delete the User Id from LN User Data from session ttaad2500m000 and do Convert to Run Time
4. Delete the User Id from Active Directory(For Windows Server) - This step is not mandatory

Thursday 30 July 2015

Important DLLs to handle Multi Currency environment

tcemmdll5000 - Home Currency functions
tcemmdll5010 - Multi Currency Operations
tcemmdll5015 - Multi Currency Operations (only for tf)

Thursday 9 July 2015

Split 1 Excel file into multiple Excel files based on data.

Requirement:
1. We have Sales Data dump with columns like- Order Number, Position, Customer, Item Name, Order Status.
2. We must create separate files for each Customer from this dump.

So lets say we create a file with the file name as <Customer Code>.xlsx and store all the records for that Customer into this new excel file. Similarly we create multiple files. Thus a new file created for each unique Customer.

Solution:
 I created the following Excel VBA Macro on the excel where full Sales Data dump is stored.

Sub details()
     Dim sh1 As Worksheet
     Dim newsh1 As Worksheet
     Dim newwb As Workbook
     Dim i, totalrows As Integer
     Dim j As Integer
     Dim newfile As String
     Dim sortcol As String
     Dim folderpath As String
     
     sortcol = InputBox("Enter the Column Number based on which u want to split the Excel. Eg. A")
     folderpath = InputBox("Enter path to store split files. Eg. C:\folderName\")
     
     Set sh1 = ThisWorkbook.Sheets("Sheet1")
     sh1.Range(sortcol + "1").Sort Key1:=sh1.Range(sortcol + "1"), Order1:=xlAscending, Header:=xlNo
     totalrows = sh1.Range(sortcol + "1", sh1.Range(sortcol + "1").End(xlDown)).Rows.Count
     newfile = ""
     j = 0
     
     For i = 1 To totalrows

        If newfile = sh1.Range(sortcol + CStr(i)) Then
               j = j + 1
               newsh1.Range("A" + CStr(j) + ":Z" + CStr(j)) = sh1.Range("A" + CStr(i) + ":Z" + CStr(i)).Value
        Else
               If newfile <> "" Then
                     newwb.Save
                     newwb.Close
               End If
               newfile = sh1.Range(sortcol + CStr(i)).Value
               Set newwb = Workbooks.Add
               j = 0
               With newwb
                 .SaveAs Filename:=folderpath + newfile + ".xlsx"
                 Set newsh1 = .Sheets("Sheet1")
               End With
               
               j = j + 1
               newsh1.Range("A" + CStr(j) + ":Z" + CStr(j)) = sh1.Range("A" + CStr(i) + ":Z" + CStr(i)).Value
        End If
     Next i
    If newfile <> "" Then
        newwb.Save
        newwb.Close
    End If
  End Sub
      
This macro is dynamic enough to handle any similar excel requirement of yours.
Usage-
1. The Sales Data dump excel file should not have any column headers.
2. When you run this. You will be asked to enter the Column name based on what you want to split the excel file. So in our case I will enter value "C" as my Customer Code is present in Cth column.
3. Then it will ask for the folder name where you want the newly generated split files to be stored.
I entered C:\temp\

Thursday 18 June 2015

Sql Server datetime timezone handling

SQL Server made modifications in 2005 onward where the internal timezone is saved in UTC. This was largely due to geo-replication and HA projectors involving log shipping, and having the log shipping times saved in different time zones made it impossible for the old method to restore them.
Thus, saving everything internally in UTC time allowed SQL Server to work well globally. This is one of the reasons why daylight savings is kind of a pain to deal with in Windows, because other MS products such as Outlook also save the date/time internally as UTC and create a offset that needs to be patched.
I work in a company where we have thousands of servers (not MS SQL Servers though, but all kinds of servers) spread out all across the world, and if we didn't specifically force everything to go by UTC, we would all go insane very quickly.

UTC is generally not very meaningful to a user.  You could theoretically convert the times to the end user’s local time zone.

A DATETIMEOFFSET gives you the ability to store local time and UTC time in one field. This allows for very simple and efficient reporting in local or UTC time without the need to process the data for display in any way.

These are the two most common requirements -
1. local time for local reports and
2. UTC time for group reports.

The local time is stored in the DATETIME portion of the DATETIMEOFFSET and the OFFSET from UTC is stored in the OFFSET portion, thus conversion is simple and, since it requires no knowledge of the timezone the data came from, can all be done at database level.

If you don't require times down to milliseconds, e.g. just to minutes or seconds, you can use DATETIMEOFFSET(0). The DATETIMEOFFSET field will then only require 8 bytes of storage - the same as a DATETIME.

Using a DATETIMEOFFSET rather than a UTC DATETIME therefore gives more flexibility, efficiency and simplicity for reporting.

Example:
SELECT t_odat As 'Order Date stored in SQL Server', CONVERT(datetime,
               SWITCHOFFSET(CONVERT(datetimeoffset,
                                    t_odat),
                            DATENAME(TzOffset, SYSDATETIMEOFFSET())))
       AS 'Order Date In LN'

from ttdsls401101

Thursday 4 June 2015

Production Planning

Bill Of Material: A (1) --- B(1). (A  - Manufactured item , B – Purchase item)
Routing: Operation for A/Unit – 1 Hour
Supply Time for B – 10 Days
Safety Time for B – 5 Days. (That means this item must be available 5 days in advance before start of the production).
Sales Order for A – 100 quantity – Planned Delivery Date – 30.01.2014

In the above case, after the planning run system gives two orders. 1) Planned production order for ‘A’ 2) Planned purchase order for ‘B’.

·         Planned Production Order Planned Finish date = Sales Order Planned delivery date. As there is no safety time mentioned for A, both the dates are same.
·         According to manufacturing time it will take around 4 days to complete the production of 100 units. SO the planned start date for A is 26.01.14.
·         As the production is starting on 26.01.14, the raw material must be available by that time. So the required date for B is 26.01.14.
·         But there is a safety time for 4 days. That means, the raw material must be available before its required date. So the planned finish date is 22.01.14. If at all there is safety time, the required date will be same as planned finish date.

Tuesday 2 June 2015

BAAN/LN DLL to Print Amount in Words

tcmcs.dll0006.decode

void tcmcs.dll0006.decode( domain tcamnt amount, boolean decimals, ref domain tcmcs.s130m decode0 mb, ref domain tcmcs.st65m decode1 mb, ref domain tcmcs.st65m decode2 mb, ref domain tcmcs.st65m decode3 mb, domain tclang i.lang )

Expl.:
Pre: -
Post: -
Input: amount to be decoded, maximum 11+2
 decimals required (boolean)
Output:
 - decode0  Decoded amount of 130 chrs.
 - decode1  Same decoded amount in two strings of 65 chars
 - decode2  "
 - decode3  Decode of the decimals

Thursday 28 May 2015

SO Sequencing


To add to my earlier Blog on PO Sequencing, I did some study on when all the SO sequence is generated and what  is the Significance of “Order Line Type” for the SO Line Sequences.

This is what I found-

Note: There is no “Back Orders Allowed” checkbox in SO Parameters. You can only Control if Back Orders is confirmed Automatically with “Confirm Back Order Automatically” flag in SO Parameters.

Generally when there is only one sequence associated with a SO Line, the sequence number of SO Line is 0  with Order Line as tdsls.oltp.detail.

Sequence
Order Line Type
Ordered Quantity
Delivered Quantity
0
tdsls.oltp.detail
5
0

Sequences can be generated in 2 ways-

1. Split Delivery Line in the Sales Order Planned Delivery Lines (tdsls4101m100) session. Main Sequence with Line Type as tdsls.oltp.total and its sub seqences with Line Type as tdsls.oltp.detail (s)

2. Partial Delivery of SO Line, were new sequence gets generated with Order Line Type as tdsls.oltp.backorder

Split Delivery Line in the Sales Order Planned Delivery Lines (tdsls4101m100):

As soon as you split the SO Line two more sequences are added to your SO Line, making the total sequences to be 3 (i.e.  0, 1, 2)

Sequence
Delivery Type
Order Line Type
Ordered Quantity
Delivered Quantity
0
not.applicable
tdsls.oltp.total
5
0
1
warehousing
tdsls.oltp.detail
4
0
2
warehousing
tdsls.oltp.detail
1
0

Now you can do “Print SO Acknowledgements”/”Release SO to Warehousing” for each tdsls.oltp.detail sequence separately.


Now let’s Partially Ship 3 qty from sequence 1

Sequence
Delivery Type
Order Line Type
Ordered Quantity
Delivered Quantity
Back Order Qty
Backorder Confirmed?
0
not.applicable
tdsls.oltp.total
5
3
1
No
1
warehousing
tdsls.oltp.detail
4
3
1
No
2
warehousing
tdsls.oltp.detail
1
0
0
No


Now we have to Confirm the Back Order against sequence 1, so that it can be received. When Back Order is confirmed, the data in the system is as follows:

Sequence
Delivery Type
Order Line Type
Ordered Quantity
Delivered Quantity
Back Order Qty
Backorder Confirmed?
Linked Sequence
0
not.applicable
tdsls.oltp.total
5
3
1
No
0
1
warehousing
tdsls.oltp.detail
4
3
1
Yes
3
2
warehousing
tdsls.oltp.detail
1
0
0
No
0
3
warehousing
tdsls.oltp.backorder
1
0
0
No
0

Now I ship Sequence 3.

Sequence
Delivery Type
Order Line Type
Ordered Quantity
Delivered Quantity
Back Order Qty
Backorder Confirmed?
Linked Sequence
0
not.applicable
tdsls.oltp.total
5
4
0
No
0
1
warehousing
tdsls.oltp.detail
4
3
1
Yes
3
2
warehousing
tdsls.oltp.detail
1
0
0
No
0
3
warehousing
tdsls.oltp.backorder
1
1
0
No
0


***********************************************************************************


Let’s See how sequencing works for Partial Delivery of SO Line, were new sequence gets generated with Order Line Type as tdsls.oltp.backorder:

Sequence
Order Line Type
Ordered Quantity
Delivered Quantity
0
tdsls.oltp.detail
3
0

I ship 2 Qty:

Sequence
Delivery Type
Order Line Type
Ordered Quantity
Delivered Quantity
Back Order Qty
Backorder Confirmed?
Linked Sequence
0
warehousing
tdsls.oltp.detail
3
2
1
No
0

I Confirm the Back Order:

Sequence
Delivery Type
Order Line Type
Ordered Quantity
Delivered Quantity
Back Order Qty
Backorder Confirmed?
Linked Sequence
0
warehousing
tdsls.oltp.detail
3
2
1
Yes
1
1
warehousing
tdsls.oltp.backorder
1
0
0
No
0

I Shipped The 1 Qty for Sequence 1

Sequence
Delivery Type
Order Line Type
Ordered Quantity
Delivered Quantity
Back Order Qty
Backorder Confirmed?
Linked Sequence
0
warehousing
tdsls.oltp.detail
3
2
1
Yes
1
1
warehousing
tdsls.oltp.backorder
1
1
0
No
0